FAQS
What unique features does this machine have that sets it apart from others?
How many stitches does it have?
Which accessories come with the machine?
What are my options for future accessories (i.e. additional feet, etc.), and what is the associated approximate cost?
What type of warranty comes with the machine?
Who completes the repairs, and how long does that typically take? (Do you haveto ship the machine to the manufacturer or does the shop do repairs?)
Are lessons/classes included in the cost of the machine?
Do the feed dogs drop for quilting?
Can I see myself sewing happily on this machine in 20 years?
Sewing machines range in price from less than £100 to over £4,000 and really the choice comes down to what you are going to use it for. If you are a novice who just wants to sew the odd garment, a basic mechanical starter model would be fine, whereas an experienced seamstress looking to will need to look at a high-tech, top-of-the-market machine.
Beginners/Novice Sewers
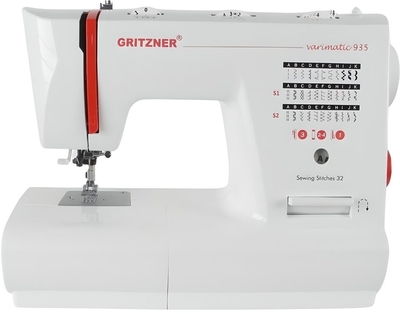
If you are likely to be using your machine for basic home furnishings like cushion covers or curtain panels, repairs and alterations and simple craft projects, go for a good-quality basic model. Machines like this cost less than £249, have enough features to keep a novice happy and should have enough scope to let you hone your skills.
Confident Sewers
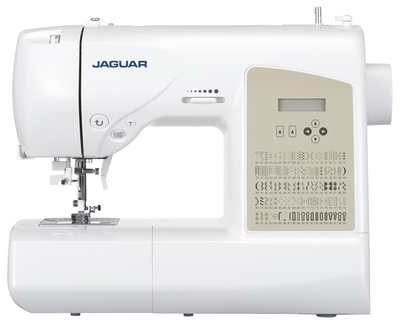
If you are likely to be using your machine more frequently, for dressmaking, decorative home furnishings or crafts you might want to look at mid-range models that offer more choice of stitches and accessories. If you are going to be using heavy upholstery fabrics you will need a sturdily built version, while if you are looking for a lot of decorative stitches, think about a computerised machine that can use these with greater precision. A mid-range sewing machine should cost in the region of £300 to £999.
Experienced Stitchers
If you are likely to be using your machine very often for embroidery, quilting, decorative touches, detailed crafts or even for professional use then shake out the piggy bank and go for a top-of-the range computerised one. You are looking at least £800 plus, but you are better off buying a machine with all the features you will ever need than finding out your choice is inadequate and having to buy another.
Feed Dogs
Are saw shaped teeth that move the fabric through the machine. As the needle stitches, the feed dogs grab the fabric, moving it under the presser foot. The term 'drop feed dog' means that the feed dogs can be used in either the up or down position. When the feed dogs are down or “dropped”, you can use the machine for work such as machine embroidery where the fabric can be moved freely under the needle.
Presser Foot
The presser foot holds the fabric in place against the feed dogs so that it doesn’t move about while you are sewing. You can buy specialised presser feet for different jobs.
Needle Plate
The needle plate is the part of the machine which fits over the feed dogs on the bed of the machine, with a hole that the needle passes through.
Knee Lifter
A knee lifter is a lever which can be pressed with your knee, allowing you to lift the presser foot and drop the feed dogs without taking your hands off the work. This is useful for quilting, sewing around curves and applique.
Free arm
A free arm is a cylinder on the bed of the machine which allows you to sew items such as sleeves and trouser legs. This usually works by detaching a piece on the base of the machine, leaving the arm protruding.
Bobbin
A bobbin is a small spool for holding thread. Sewing machines use two threads to make a stitch: The needle thread, coming downwards from the top of the machine and the bobbin thread coming upwards from under the needle plate. Thread is wound onto the bobbin before you begin sewing, then fitted into a bobbin case and put into place.
Stitch Selector
On more basic machines, the stitch selector is usually a dial which allows you to select different stitch types. On computerised machines this is done by pressing a key or using a touch pad.
Integrated drop feed
The teeth drop down, making it easier to move the fabric freely - useful when quilting or embroidering.
Integrated dual feed
if you’re sewing 2 pieces of fabric together, such as quilting, this handy feature ensures a smooth, equal feeding of both fabrics. Only availiable on Pfaff Sewing Machines.
Lock stitch facility
This helps when you’re starting or ending a stitch or embroidery, as it stops it unravelling.
Needle plate
The needle plate is the part of the machine which fits over the feed dogs on the bed of the machine, with a hole that the needle passes through.
Twin needle
This gives parallel rows of stitches if you’re after a more decorative or stronger seam
While hand stitching can be a joy, a sewing machine can save you time and give your projects a professional finish. If you’re just starting out, or only intend to sew now and then, an entry level electronic model will suit your sewing needs.
Often beginners are donated a second hand sewing machine from parents or relatives, and while this can save you money, old fashioned manual models lack accuracy, speed and many basic features.
New electric sewing machines, which contain a motor that drives the needle, control a bobbin and feed the material, allow for different sewing speeds, and offer a range of stitches.
To begin with, look for a model with several stitch types such as different length of straight stitch, a choice of zig zag stitch and a one-step buttonhole.
Other beginner time saving features to consider are things like an automatic needle threader, a top loading bobbin and a selection of basic foot attachments including a zipper foot, which allows you to insert a zip.
If you want to start sewing craft projects, repairs and dressmaking, a basic range of stitches should suffice. Decorative ones are nice to have but not worth paying more if you’re going to occasionally use your machine.
Start your sewing journey on one of these great machines on the link below, ideal for beginners:
https://www.gursewingmachines.com/sewing-machines/all
On the left hand side of the page, click beginner.
If you love making your own garments, there are a few extra options to look for that could help your style stitching.
First of all, search for a machine with a metal body or frame. The heavier and more stable the better. This means it won’t be as portable, but a sturdy model will be able to handle and feed thicker fabrics. Also, consider a machine with a more powerful motor – for faster stitching speeds.
Many time-saving functions are becoming commonplace in modern machines, such as a one-step buttonhole option, a needle threader, easy stitch width and length control and twin needle capability for parallel stitching.
Some models will enable you to sew backwards automatically to achieve various patterns, which come in handy not only when sewing stretch fabrics, but also when reinforcing seams for a neat edge.
You’ll also need flexibility with your needle positions for dressmaking, Being able to change the position of the needle can really help with hemming and topstitching.
Free arms are also a must if you want to sew or hem sleeves trouser legs or pockets. A selection of foot attachments will also be an advantage; look for a machine with a zig zag, zipper, blind and narrow hem and a piping foot.
Please click on the link below:
https://www.gursewingmachines.com/sewing-machines/all
On the left hand side of the page, click dressmaking.
Mechanical sewing machines are basic models, with fewer features and a bit more work for you to operate. They can sew most materials but lower-priced models are best suited to light- to medium-weight materials.
Electronic sewing machines work by a motor that sends an electrical impulse to work the needle and feed dogs that feed the fabric. This is conjunction with the feeding mechanism and you operate the machine by a foot pedal. This allows both hands to be kept free to guide the fabric and the speed to be adjusted. Stitch types and lengths are selected by using a dial. An electronic machine will suit the needs of most home sewers as their function, number of stitches and price vary greatly.
-
Computerised sewing machines are best suited to the experienced sewer who wants to upgrade to a more versatile machine. They work by using several motors to control different functions of the machine.
-
This very precise control makes it possible to produce hundreds of different stitches, which are selected by pressing a key or using a touch pad linked to an LCD display screen. They may feature the ability to memorise past projects and to download designs from the internet when connected to a PC.
If you love making quilts and sewing home furnishing, it may be worthwhile investing in a machine built or the job.
A must for piecing or quilting is a great straight stitch. One way you can achieve this by ‘test driving’ the machine at a local dealer before you buy. Take fabrics with you that you intend to use. For quilting, you’ll need it to handle bulky projects with many layers.
Choose a specialist model that is up for the challenge and is built to withstand heavy duty fabrics. A range of handy features makes them easier for quilting, including an extra-large sewing space, larger arm length, facilities for feeding and a knee lift lever to keep both your hands free.
Consider a machine with a powerful motor that won’t overheat – as you’ll be stitching for long periods of time, this is really crucial. Other features to look for are an automatic thread cutter, needle up/down options and an integrated dual feed capability.
An extension table (which can be bought as an add-on with some models) will increase the flat surface work area to the left of the needle to support your quilt and are ideal for big projects. The addition of a bright illuminating LED light will also make seeing what you’re doing easier, and keep you stitching into the night.
You’ll be able to explore your creative potential as many of these machines offer a wide range of stitches, including specific quilting options and alphabets. You won’t know what to start stitching first.
If patchwork and quilting are your passions, bag one of these specialist models on the following link below:
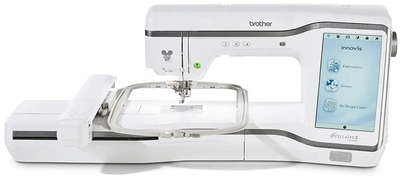
If you’d like to expand your creativity and try adding personal touches and textile art to your projects, you may like to consider investing in a specialist embroidery machine. Although to begin with, it may be more economical to buy a sewing machine which you can add embroidery options to.
Many do still function as a normal sewing machine and if you plan on doing a lot of embellishing and have a bigger budget, consider a top-of-the-range, computerised model.
Many embroidery machines are now computerised so they can connect to your PC via a USB portal or memory card to download your own designs. They also offer in-built memory and a wide range of pre-programmed patterns to use. Some also provide software for additional options, such as converting fonts into embroidery files and scaling up smaller designs.
Most of these machines can stitch with three colours of thread simultaneously to create multi-coloured hoop embroidery patterns. You’ll need to consider what size projects you want to create and get a hoop size to match. Be mindful some machines only accept very small hoops which will limit the size of designs
Other factors to consider is if the machine offers a wide range of stitches, can use more than one needle and includes a drop feed - handy If you do freehand embroidery or darning.
As these machines are top spec, you can’t really go wrong with your choice, it’s just a case of finding a model that you’re comfortable with for some personalisation fun.
It’s time to get personal! Discover the latest Embroidery Machines by clicking on the following link:
When choosing a machine in this price range, quantity is often favoured over quality. Customers generally decide to purchase a machine with more built in stitches than others. However, this may not always be as good as it sounds. The vast majority of stitching will be done using a straight or zig zag stitch, so all those extra fancy stitches built into your machine will rarely get used, if ever.
Therefore, quality, width and / or length adjustment and button holes are more important factors to consider when purchasing a machine in this price range. The number of stitches should be considered only if you plan on using them regularly.
When looking at a machine in this price range, the machine will most likley have a top loading bobbin, One step buttonholes, Automatic needle threaders and a larger range of sewing stitches.
In this price range, machines are often computerised. They often have various embroidery satin stitches, wider zig zag width, and stitch memory. Alphabets and numbers may also be built in.
Push the boat out with a high-end machine, fit for a home professional or a full-time sewer. If you do large amounts of sewing or you plan to use your machine most weeks, you may like to invest in a higher-end model.
At this level, models can cope with high volumes and have incredible powerful motors that won’t burn out with constant use.
The main variation at this price is the upgrade to a full computerised machine. If you are a techie then you’ll love the coloured digital LCDs, which will become your new best friend as your on-screen creative consultant.
No longer will you have to struggle with stitch settings as these fancy info panels will recommend which presser foot, tension, width and length to use for the stitch you’ve chosen.
These very precise controls make it possible to produce thousands of different stitches, which are selected by pressing a touch pad. Many offer in-built memory to save past combinations and are able to download designs from the internet via your computer.
These high-end models include everything their cheaper counterparts have and so much more. With more space and height, maximum speed control, extra needle penetration, auto-lock to finish off your thread ends and a needle/up down option for pivoting on corners, everything becomes a breeze for super –slick sewing.
Achieve Professional Results with these Top Spec Models:
For the height of sewing luxury, look no further than one of these dream machines. These are predominantly aimed at the advanced sewing enthusiast and for commercial business use – but there’s no harm in window shopping!
You’re likely to find these wow-factor machines in the sewing studio of a textile artist, or in couture fashion houses and wedding dress boutiques, so if you work on a larger scale then they may be just what you’re looking for.
If you’re in the market for one of these incredible machines, you’ll be amazed at the advances in sewing technology. Many are now virtually computers in themselves with in-built digital capability to connect to the internet to access and download designs.
If you are a techie, then you’ll love the coloured intuitive LCD touch-screens, some the size of a tablet, which will become your new best friend as your on-screen creative consultant offering advice and tutorials. Many models will allow you to scan your own imams and designs into data onto the machine’s computer.
Some also feature adaptive thread tension both at high and low speeds, built-in dual feeds, upper and lower thread indicators, automatic measuring buttonholes and a wide range of specialist accessories
With camera-eyes, you’ll be able to view what your needle sees. Pair that with these machines’ laser guide line and you’ll be able to produce the finest quality stitching!
Get these Dream Machines on your wish-list:
https://www.gursewingmachines.com/janome-horizon-memory-craft-15000-sewing-machine-17263
https://www.gursewingmachines.com/brother-innovis-xv-sewing-machine-21504
When choosing a machine with a Front Loading Bobbin, the bobbin case has to be removed from the machine so the bobbin can be loaded into it. This type of bobbin will work fine if kept well lubricated and free of lint.
A Top Loading Bobbin case remains in place for threading and is only removed for cleaning. This system is easier to use then a Front Loading Bobbin as it just drops in from the top. They are often also fitted with a transparent plate so the amount of thread left is visible.
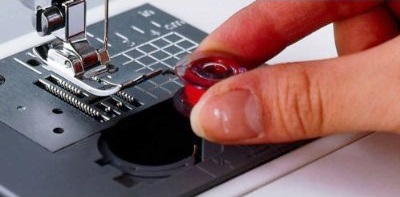
Nearly all machines include this facility nowadays. The toolbox can be removed from the machine, converting it from a flat bed to free arm. The free arm can be used for any difficult to sew areas.
Lower priced machines will not have adjustable length and width controls. They will only have 1 dial on the machine for stitch selector, in which the width and length are preset. Some will have 2 dials, stitch selector with variable length. People who will be using more than just the straight stitch will find it a great advantage to have separate length and width controls.
This will be standard on mid range machines and above. When sewing bulky materials, this facility is a must as some materials can be difficult to feed evenly. The pressure can be increased to make the feed dog grip the material and sew perfect even stitches. The pressure can be recuded when sewing delicate materials such as silk. Some machines have automatic foot pressure. The pressure is estimated by the thickness of the material under the foot.
Most machines have an automatic button hole facility. 4 step button holes are common on entry models, where the user turns a dial to sew each side of the button hole. On higher end models, a 1 step button hole facility is common. The button is loaded into the button hole foot and the machine will sew the 4 sides of the button hole in 1 step to match the button.
Stretch stitches, where the machines sews backwards aswell as forwards are available on all except the most basic machines. These stitches sew backwards as well as forwards to achieve various stitch patterns. These are useful not only when sewing stretch fabrics, but also for reinforcing seams.
This feature will limit the speed that the machine will sew when the foot control is fully pressed. This is useful for quilting or sewing around curves and corners etc.
AC motors are usually found on mid range machines. DC motores are generally used in computerised machines. DC motors have the advantage of being more controllable and offer better needle penetration at slower speeds.
This feature lowers the needle into the material so you don't have to turn the balance wheel. When the machine stops, the last stitch will have been completed and the needle will always stop at the needle bar stroke.
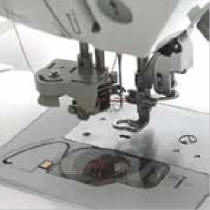
On computerised machines, this feature locks the stitch by automatically reversing at the start of the seam.
An information window will recommend which pressure foot, tension, stitch length and width to use for a particular stitch. It is found most commonly on computerised machines but also on some mechanical ones.
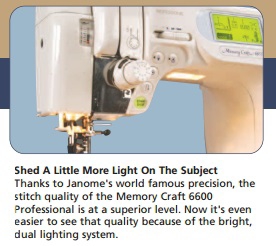
These are useful, but not essential. A hook located behind the needle and hooks through the eye of the needle to pull the thread through.
Automatic Tension is helpful, but not essential. Leaving the tension dial midway, and providing the same thickness of thread is used both top and bottom, the tension dial should rarely need adjusting.
Found mostly on computerized machines, this enables the user to string patterns together.
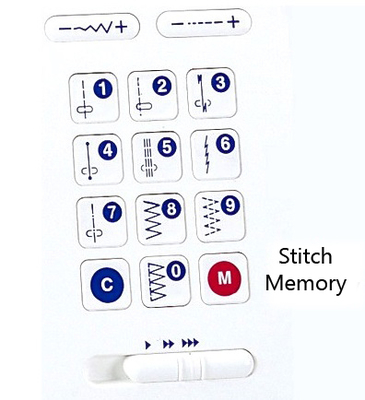
The 6 or 7 piece feed dog helps grip the fabric as it is being sewn delivering perfect even stitches. Excellent for buttonholes and other satin stitches.

Four Basic Steps before you sew!
Solution:
- Always turn the handwheel TOWARDS you (counter clockwise) as turning it in the opposite direction (away from you, clockwise) may knock the timing out requiring repair from a service centre.
- Always be sure your presser foot is in the DOWN position before sewing. Sewing with the presser foot in the up position will cause your thread to tangle and your bobbin to jam.
- Change needles regularly as dull/weak needles can cause damage to your machine and fabric.
- Always be sure you are using the correct bobbin for your machine.
Sometimes your machine just doesn’t want to co-operate! For me, it’s usually when I’m working with a deadline. The thread breaks, my needle bends, or skipped stitches – UGH!
Solution:
- When’s the last time you cleaned your machine? It can get linty in the bobbin case area. You should clean your machine fairly often and you should be able to tell when it needs a cleaning. A small brush and compressed air are both very helpful tools.
- Un-thread and re-thread your machine entirely. Sometimes you forget a loop when you’re threading and everything goes haywire. Also make sure your bottom bobbin is threaded in the correct direction.
- Check your needle. Does it need to be replaced? Is it the correct size and type for the fabric you are using?
Problem: My thread is bunching on the back of my fabric!
Solution:
- We definitely recommend re-threading your machine. Go slowly and make sure you aren’t missing anything. Check your bottom bobbin too – is it threaded correctly? A lot of the time thread bunches at the back of your fabric because the machine is not threaded properly.
- Are you using good quality thread? Are you using the right thread for your project?
- At the beginning of each seam, hold the top and bottom threads up and away under the presser foot. This should help with any bunching that occurs at the beginning of your stitches.
- Make sure your presser foot is in the down position while sewing.
- Check your tension settings for your upper thread – see your instruction book for tension settings.
Problem: Adjusting Tension
- A properly threaded sewing machine with the correct tension settings should set you on your way to happy sewing. But it’s not always easy to determine which tension settings to use. Your sewing machine probably has a dial with numbers, but sometimes unmarked. The general rule is “lefty losey, righty tighty”. You’ll adjust your top tension most often, depending on your fabric and thread. Always use a scrap of fabric to test out your tension before you sew any seams.
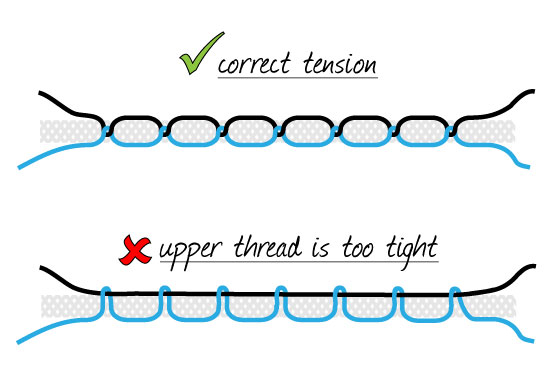
- Adjust your upper thread tension slowly and inspect your test fabric for signs of improvement or decline in how the stitches are coming together.
Why is my electronic machine beeping? Why won't my machine sew? Why will my machine start to sew then stop?
Solution:
- You may have accidentally lowered the buttonhole lever located just to the left of the needle bar. To make sure it is in the correct position for sewing, place your finger under the lever and push up.
- Also make sure the needle is set at the highest position and the bobbin winding spindle has been pushed back to the left.
- NOTE: To set the needle at the highest position, turn the hand wheel TOWARDS you, until the needle moves to the highest position.
- Finally, push the reverse button a couple of times, this will reset the machine.
- If none of the troubleshooting techniques above solved the issue, please contact the GUR Sewing Service Centre to have your machine serviced.
Why is my bobbin not winding evenly?
Solution:
- If your bobbin is winding unevenly, it’s possible you have not placed the thread correctly around the bobbin winding tension spring. If you believe the thread is placed correctly, please try wrapping the thread around the tension spring a second time – a common practice among keen sewers.
- If none of the troubleshooting techniques above solved the issue, please contact the GUR Sewing Service Centre.

Why is my machine skipping stitches?
Solution:
- Skipped stitches can mean one of two things: needle issues or disrupted timing.
- First, your needle may be dull or damaged and needs to be replaced. You should also check that you are using the correct needle for the type of fabric you are sewing. For example, knit and synthetic fabric requires a ballpoint needle. (Please see our How To Choose The Right Machine Needle For The Job section for more information).
- Next, check the needle is inserted correctly. The needle needs to be pushed as far up the needle shaft as possible. (It’s easy to insert the needle half way, clamp it down and think it is inserted correctly).
- Also, the flat part of the needle should be positioned towards the back. If the needle is not inserted correctly, it will not be able to pull up the bobbin thread and will cause skipped stitches.
- If the trouble shooting tips above did not correct the problem, please take your machine into a GUR Sewing service centre. It is possible the timing on the machine has been disrupted and needs to be reset.
Why doesn’t my stitch pattern match what is on my machine?
Solution:
- Different stitch patterns require different stitch lengths in order to sew correctly. Depending on your machine model, a decorative stitch such as a crescent or bead stitch will require the Stitch Length dial to be set at a smaller number (between 0.5 and 1.5).
- Continue to decrease the Stitch Length until you obtain the desired effect. If your machine has stretch stitches, you may be required to set the Stitch Length dial to the “S” or Stretch setting to obtain the stitch you want.
- The width setting can also affect the look of your stitch. You will obtain the best results if you set the Stitch Width dial to the highest number.
How often should I oil my machine?
Solution:
If your machine manual does not include instructions on oiling, your machine has been pre-lubricated at the factory and will not need additional lubricating. However, you can put 2 to 3 small drops of sewing machine oil in the bobbin case area and on the needle bar as this will not harm the machine.
How do I sew denim and heavy fabrics?
Solution:
To sew denim, we recommend that you use a denim style needle. You will need to set the machine for a straight stitch with the length regulated between 4 and 5 to allow the thread to wrap around the extra thickness of fabric. You will also get better results if you use the metal all-purpose foot that was originally attached to the shank when you took the machine out of the box. If you want to use topstitching thread, use it in the upper tension only; use regular all-purpose thread in the bobbin.
Sew at controlled moderate speed when sewing over multiple layers of seams.
What types of thread should I use?
Solution:
- Household sewing machines are designed to be used with regular all-purpose sewing thread. This thread can be purchased from your local sewing or fabric store. Most all-purpose thread is 100% polyester. If you are quilting, you can use cotton thread. The brand of thread we would reccommend are Gutermann or Drima.
-
You can occasionally use a heavy duty thread or buttonhole twist. However, using this type of thread constantly will eventually damage your machine’s tension. If you do use heavy thread, be sure to use a appropriately sized needle (size 16 or 18) and increase the stitch length.
What foot do I use for normal stitching?
Solution:
While the identification from machine to machine will vary, the metal zigzag foot is the normal one. Many manufacturers will call it ‘A’ or ‘0’. Brother refers to it as ‘J’ and Singer often stamps it ‘B’. This foot is used for normal stitching primarily because it has a flat lower surface which helps to ‘iron’ the stitch after it is formed.
How long does a sewing machine needle last?
Solution:
It can last anywhere from 5 minutes to 8 hours, depending on what is being sewn. As a rule of thumb I recommend replacement of your needles every 2nd garment or 5 hours sewing time. Your needle is the cheapest part of your garment but is also the most likely equipment to destroy your project. Remember, if you can hear the needle hit the fabric, that is also a sign it is time for a new one. Please remember to dispose of sharps thoughtfully also.
Can I use a generic bobbin?
Solution:
Short answer is NO. Use only bobbins that are designed for your machine. If in doubt email us at info@gursewingmachines.com with your make and model and we will point you in the right direction.
- Sewing machine needles have an interesting shape. Look closely at one, and you will see it has a groove down the back. This is where the thread is tucked as the needle takes its stitch. One side of the top is flat. This is to make sure you don't put your needle in backward. It also assures your needle is held tightly by the needle clamp.
- Needles come in a variety of sizes and styles. The most common is the size 14 sharp-pointed needle. This is used for nearly all woven fabrics. The size 16 sharp-point is thicker and better for use on denim and other heavy fabrics. Size 11 needles are extra fine and will leave smaller holes in some delicate fabrics. In knit fabrics, a ballpoint needle works better than a sharp-pointed needle. That's because the rounded needle point will slide past the individual threads instead of catching them and dragging them through the hole in the needle plate.
- There are also special twin needles designed for topstitching or for double stitching on stretch fabrics. Be sure your machine is designed to accommodate twin needles before you try these.
- The needle is the first thing you should check when your machine doesn't seem to be working properly. If your needle is dull, it can poke your fabric through the hole instead of penetrating the fabric. This will cause your machine to skip stitches because the bobbin hook is prevented from catching the thread. If your needle is bent, it may be missing the exact spot where it needs to pass the bobbin hook. Needles can become dull after use on heavy fabric, especially when thick seams cross one another, from hitting pins, or because the needle clamp is loose.
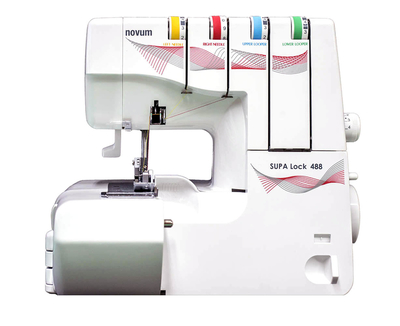
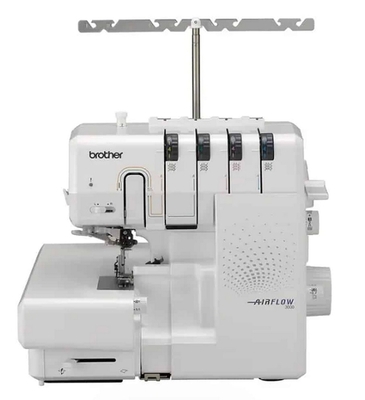
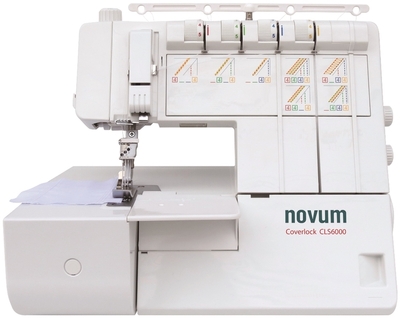
The main benefit of an overlocker is that it can sew a seam, finish the edge and cut off the excess fabric in one step. An overlocker can be very useful if you only want to do simple projects such as making curtains or taking up hems but does not have the versatility of a sewing machine. It cannot, for example sew buttonholes or zips. Overlockers give a more professional finish to garments and projects. They are also great for sewing knitted fabrics, making a useful additional item, especially if you sew frequently. Overlockers are also known as “sergers”. they are professional machines and should be used together with a sewing machine and not instead of. Although they can be quite versatile, the basic task of an overlocker is to trim and wrap the edge of the fabric to prevent it from fraying.
They can also be used for sewing seams, rolled hems, attaching tape, elastic, beads, etc and blind hemming. However, some tasks require special attachments and not all attachments are available for all overlockers, especially the lower priced models.
The process of choosing an overlocker is different from a sewing machine. Where as the price of a sewing machine increases as the capability and amount of features increase, features available with an overlocker are not as extensive. Instead, most overlockers will perform similar tasks but the more expensive overlockers will cope better with difficult fabrics and will also be easier to thread.
If you’re serious about dressmaking, then an Overlocker is something you might want to think about. Also known as a ‘serger’, these compact machines don’t allow you to sew everything, but are used independently to neaten edges, seams and hems, and stop fabric fraying for a professional finish.
If you look inside your shop-bought clothes, you’ll notice the overlocked finish as they are used for manufacturing pretty much all our commercial garments. They can sew a seam, finish the edge, and trim excess fabric all in one go.
Although they aren’t equipped to sew zips or buttonholes, they do have decorative stitching options. In addition, you can buy attachments that make them particularly useful for stitching rolled hems and gathering and attaching bindings, so they are a great addition to support your regular sewing machine.
They are also good for sewing knitted and stretchy fabrics, such as jersey and can even be used to join seams without a regular machine.
The reason many invest in an overlocker is because without one you have to neaten the edge by cutting the fabric yourself, then zig zag stitching which can create a slight ridge. Being able to do this all in one go with a professional finish will save you time and will be worth the extra spend.
If you can’t afford an overlocker as well as a new sewing machine just yet, add it to your wish list and in the meantime use the close-set zig zag stitch instead.
Finish seams professionally with the ideal companion for the home dressmaker, by clicking on the link below:
These overlockers are ideal for general domestic tasks. A 4 thread machine which can be converted to be used as a 3 or 4 thread will have a differential feed. Other standard features are an easy to follow colour coded thread path, adjustable stitch length and cutting width and an instructional video or DVD will be included.
It may also have an easy change rolled hem device and include some extra attachments.
In this range, overlockers will include all the features above, but will be more capable of trimming and overlocking a wider range of fabrics. The tensions units will be the "lay in" type and the left looper will have an easy threading device.
As well a 3 or 4 thread combinations, it may be capable of being used with just 2 threads and it will have an easy change rolled hem.
These overlockers are serious professional machines which will be of solid construction and capable of daily use. They may have unique features such as the Babylock Jet Airs which "blow" the thread through the guides (or tubes as they are on those models), computer controlled or automatic tensions which adjust for various stitch combinations and built in cover hem.
As the price of overlockers has come down, 3 thread overlockers have largely been discontinued with 4 thread machines replacing them as the entry models.
Not every task requires 4 threads to be used so 4 thread overlockers can be used with only 3 threads and some of the more expensive models can be used with 2, 3 or 4 threads.
5 thread machines are even more versatile offering a variety of stitch combinations and the Babylock Evolve has 8 threads offering almost endless combinations.
Overlockers equipped with differential feed have two feed dogs, one in the front and one in the back. When the differential feed is set at N the front feed dog will feed the fabric at the same rate as the back feed dog.
When the differential feed is set at 1.3 to 2 the front feed dog will feed more fabric than the back . This is because the front feed dog moves a greater distance than the back feed dog. For example, when the differential feed is set at 2, the front feed dog will move twice as far as the back feed dog. In this case, the front feed dog is feeding in twice as much fabric as the back feed dog is feeding out. The result is that the fabric will be gathered. Differential feed settings from 1.3 to 2 are used for gathering and easing as well as compensating for stretch distortion of knitted fabrics.
When the differential feed is set from 0.6 to 0.8 the front feed dog moves less than the back feed dog. For example, when the differential feed is set at 0.8 the front feed dog will feed 20% less than the back feed dog. This is useful for eliminating puckering on woven fabrics and stretching knit fabrics for a lettuce leaf effect.
You can use regular sewing machine thread. However, make sure you have enough thread to finish the project. Overlockers use more thread than a sewing machine. You may also need to adjust the tension settings. Sewing thread is heavier than overlocker cone thread.
Where as a sewing machine has a top thread and a bobbin thread underneath, an overlocker doesn`t.
A 4 thread overlocker, for example, will have 2 needle threads and 2 looper threads. The needle threading is similar to that of a sewing machine but the loopers are instead of a bobbin.
A right (or upper) looper is again, straight forward to thread but may require tweezers (included with every overlocker). To thread the left (lower) looper may require tweezers or may have an easy threading device.
Threading is often the biggest concern for customers buying their first overlocker but every overlocker displays a colour coded thread path and they also come with a video or DVD and a fully illustrated instruction book.
The easiest way to rethread an overlocker (although often frowned upon by some demonstrators as they say the customer doesn`t learn to thread their machine) is to cut the threads at the back and tie on the new colour. The threads can then be pulled individually through the guides.
Each thread has its own numbered tension control (same colour as the appropriate thread path) which are factory set for a balanced stitch and it is helpful to make a note of these numbers for future reference.
The entry models have the "wrap around" front tensions which are on the front of the machine and providing the user makes sure that the thread is located correctly in the tension unit, threading is straight forward.
The mid to upper range machines have the more user friendly "lay in" tensions which are situated along the top of the machine.
Stitch Combinations
2 thread - uses one needle and the left (lower) looper threaded. This stitch is the most basic form of overedging and simply wraps the edge. Ideal for situations where you don`t want the edge to be too bulky. However, the seam will not be secure and a lockstitch would be required.
3 thread - uses one needle and both loopers. This stitch is ideal for overedging single layers but will need a lockstitch for secure seams.
4 thread - the most popular combination using 2 needles and 2 loopers. This can be used to sew secure seams as the second needle acts as a safety stitch preventing the seam from coming undone.
5 thread - these can have a variety of combinations but the most popular gives a straight chain stitch away from the overedging stitches.
Every full size overlocker on the market today has a differential feed but, although it can help to give a neater finish, it is often neglected.
This feature adjusts one of two individual feed dogs and by doing so, gives better results when overlocking lightweight or stretch fabrics.
When stretch fabrics are overlocked using a machine with a standard feed, the fabric may appear wavy and fluted. By adjusting the differential feed, the edge will be flat and the finish will be neater.
Similarly, lightweight fabrics may be puckered after overlocking but this will be corrected by adjusting the differential feed.
This finish is ideal for lightweight fabrics, especially bridal.
It is achieved by using one needle, three threads and by adjusting the tensions and using a very short stitch length, the edge of the fabric will roll over and is encased by the closed up stitching.
This stitch can only be achieved using a cover hem only machine or a combined overlocker and cover hem machine.
Used mainly for hemming and covering a raw edge in one operation, the stitch wraps the edge under the fabric and has double or triple lines of stitching on the right side.
The overlocker should be cleaned after each project is completed. If you are working on a large project that creates a lot of lint build up, you may need to clean the machine a couple of times while working on the item. You can clean the overlocker yourself by using an air compressor or your vacuum cleaner. Problems that can occur if a machine is not cleaned on a regular basis are: inconsistent stitching, a noisy machine, and improper feeding. Avoid these problems by making sure to clean all thread guides and brush the lint off the knives and feed dog frequently using the brush that included in the accessory pack.
How do I turn corners using the Overlocker?
Outside Corners: Stitch to the end of the corner edge, but not beyond. Stop with the needles up and raise the presser foot. With tweezers pull approximately 1/4" of slack thread above the needles. The slack will allow the fabric to be pulled slightly to the back, clearing stitches from the stitch fingers. Turn the fabric, aligning the new edge with the edge of the needle plate. Remove any slack from the needle threads. Lower the foot and continue sewing.
Inside Corners: Cut an inside corner in a piece of fabric. Line up the edge of the fabric with the edge of the needle plate. Begin sewing. Stitch until the needles are about one inch away from the corner. Lower needles to secure the fabric and raise the presser foot. Manipulate the fabric until the cut edge pulls straight and a pleat forms to the left of the presser foot. Continue sewing until the inside corner is complete.
I can't get it to make an acceptable stitch. What should I do?
Whenever you are having a problem getting an acceptable stitch with your overlocker here are some troubleshooting tips for you:
- Change your needles. You should change your needles after every project or 10-12 hours of serging.
- Check all threading guides or thread path to make sure the threads haven't slipped loose anywhere or twisted.
- Check to make sure all your tensions are set correctly and that the threads are all seated in the tensions themselves. Make sure they are free from lint and excess thread.
- Check to make sure you have the proper needle plate on your machine, or that the stitch finger is in the proper position for the stitch you are creating.
- Choose an appropriate stitch length and width for the type of stitch you are creating as well as for the fabric you are working with. Check your manual for suggested settings.
- If none of the troubleshooting techniques above solved the issue, please contact the GUR Sewing Service Centre to have your overlocker repaired.
Lower looper thread keeps breaking even though I have re-threaded it a dozen times.
Before you rethread a broken lower looper thread, make sure the needle thread are unthreaded, thread the lower looper and then the needles.
I am having problems with my serger occasionally breaking needles. What should I check?
You can check the following things. Was the needle inserted properly? Is the needle bent or worn? Are the right and left needles threaded with the correct threads? Was the fabric pushed or pulled through machine? Is good quality thread being used? If the problem persists please contact the GUR Sewing Service Centre to have your overlocker repaired.
The possibility of choosing precisely the ironing temperature and to vary the pressure allows you to iron any type of fabric. Such as shirts, pleated trousers, knitted clothing or bedding (it is possible to iron three or four layers of fabric in one time).
What about complicated items?
Anything that is difficult with an iron is still difficult on a press but with a bit of practice and the use of the pads provided you can iron most items. Even Knitwear and wool can be ironed at an appropriate temperature.
Will it put a shine on the fabrics?
A shine on the fabric is caused by the movement of the standard iron. The presses by pressure and no movement is required under the heating shoe. As a result the fabric will not have a shiny surface and look less worn.

No, modern presses use very little energy, about the same as a normal iron in overall hourly running costs. They cost approx. 8-10p an hour to run - but you will use it for less than a normal iron
a) Non-Steam
The non-steam version will probably have a longer life and less maintenance as there is no steam boiler. The finish is achieved by damping down with the spray bottle provided and the pressure of the press.
b) Steam
The steam is very effective where an occasional shot of steam is required for creases in trousers etc. and should not be compared to the continuous flow of a steam iron. For extremely dry clothing an extra damping down with the spray bottle is recommended. This is an excellent press providing steam is used as an aid rather than for continuous use, and distilled water is used for the steam boiler. It may require more long-term maintenance and have a slightly shorter lifespan than the non-steam version due to the presence of water. 80% of our sales are the non-steam version and this is the one we recommend for the reasons stated above. If you want any further advice please ring the Sales office.
Don't forget, whichever version you choose, the best ironing results are from laundry which is not bone dry.
Yes, most users report that it saves them half or more of their normal ironing time.
Yes. Customers report that after a short period it is very easy and convenient to use.
The presses have several safety functions built in. When it is switched on and closed, a buzzer sounds and the heating element is automatically switch off after ten seconds of non-activity. The same buzzer will sound followed by an automatic power shut off, if the elnapress is not used for fifteen minutes. The presses have a two part fixed and movable handle which interlock with each other for safe transportation.
It weights approx 12kg, most people find it a reasonable weight to pick up and put on the table, due to the handle that allows you to carry it.
The choice of the ironing temperature is made by a touch on the selection screen or by using a knob depending on the press model.
Yes it requires very little maintenance. However, occasionally, it is necessary to clean the shoe to remove primers, residues of cleaning products, thread particles, etc.. In this case, we recommend you to use the cleaning stick.
Read the following in order so yoiu won't damage the shoe of your press:
- Heat the press on silk. Once the temperature is reached, turn it off, and disconnect it.
- Position the press upside down, being careful not to scratch the plastic parts.
- Apply the stick on the shoe, wait a few seconds until it melts.
- Wipe the surface with a soft cloth.
- Do not use alkaline cleaning products (as used for ovens, for example), nor abrasive cleaners or steel wool.
- After cleaning, it is possible to recreate a protective film on the warm shoe by applying a thin layer of protection liquid with a soft and clean cloth. Leave the press open for 20 minutes, switched to maximum heat. Then turn off the press. Let it cool down before closing it.
As a result of pressure, buttons, zippers or other decorations, will become embedded in the padding foam of the board and thus be protected from the pressure. The heating shoe will not be damaged by this.
Apart from wiping the heating plate after use and occasionally replacing the ironing covers and pads there is no maintenance required.
We carry all spares for the press. We have repairers in many areas and where we don't we pick it up and repair it and return it to you. We guarantee spares availability for the life of the press and the prices are very reasonable.
Sewing machines are kind of like mobile phones. There are all sorts of bells and whistles available but most of the time you don't use them and sometimes you can't even figure out how. Don't waste money on bells and whistles if you won't use them. There are a lot of good brands - Pfaff, Husqvarna Viking, Janome, Brother. Stay away from the new Singers, although the old ones (30 years or older) are still excellent workhorse machines. Look for a good, sturdy machine. Where you buy the product is almost as important as what you buy. The right store should be able to give free lessons, service your machine and answer any questions you might have - we provide all of these services! You are not going to get this kind of support from a discount / department store.
We do a price match promise on all of our Sewing Machines/Overlockers. If you find somebody else with the same Sewing Machine/Overlocker but cheaper, please email us at info@gursewingmachines.com.
- The website link
- Price of the product
- Contact Details
We will then get back in touch with you within 24 hours with a phone call, where we can match the price and provide you with this item that you require.
On the occasion there is a product that you require and you can’t seem to find this product on our main website, we would suggest you send us an email to info@gursewingmachines.com
Within this email you would need to supply us with:- The item product code or name
- Contact details
We would then get in touch with our suppliers and within 24hrs you would receive either a call or email regarding the items price and availability.
All the machines we supply are brand new, unless stated. Every new machine will be delivered in its original packaging with its own unique serial number located on the rear of the machine and on the box.
We have a tendency to offer Ex Demonstrator and Re-Conditioned machines.- Ex Demonstrator machines are practically brand new machines which are placed on the shop floor for customers to see. They often have very little usage before sale. Please note the Ex Demonstrator machines always come with the original packaging, parts and full manufacturers warranty.
- Re-Conditioned Machines are machines we tend to bring in as trade in offers. They are checked over for any faults by a fully trained engineer, however if any faults occur they are instantly rectified. Please note not all Re-Conditioned machines come with its original packaging or parts.
You can order online on our easy to use and secure website.
Before you place an order you will need to look for the item either through the search box on the top of the website or through our easy to navigate shop categories. We have a wide range of products, so if you are struggling to find what you are looking for please contact us through email info@gursewingmachines.com.
Or you can call our Customer Service Helpline on 0121 359 5335. We will always try our best to provide you with the product that you require.
We also offer the best telesales service which allows you to place your order over the phone.
Phone lines are open 9:00am - 5:00pm Monday to Friday.
All orders to Mainland UK addresses are Free Delivery. Smaller items are sent out via Royal Mail and delivery will normally take 2 to 7 working days. It is our policy that we will endeavor to dispatch our orders on the same or next working day.
Sewing machines and larger items are sent out for next day delivery (UK Mainland) through our courier service DPD.For more information on deliveries, Saturday deliveries and international deliveries please click the link below:
Yes. We do allow our customers to have freedom over the items they purchase. However for payment authorisation we would also require the address in which the card is registered to.
Due to the speed of our service we cannot always add items to an order if your order has already been processed. However if you contact our Customer Service Team within 24 hours of placing your order, if your order has not yet been processed they may be able to add items to your order for you.
Due to the speed of our service it is not usually possible to cancel but please call our Customer Service Team on 0121 359 5335.
If your order has not yet been processed it may be possible to cancel. If your order has already been processed, please follow the usual returns procedure.
If your machine develops a fault within the guarantee period, which has been caused by defective materials or poor workmanship. We will happily arrange the collection, repair and return at no cost to the customer. Please retain the original packing materials, in case your item has to be returned to us. In the event that the item should need to be returned to ourselves and the original packaging has not been retained, you will be responsible for any costs incurred by couriers to return the machine to ourselves This does not affect your statutory consumer rights and excludes expendable parts (such as needles, bulbs, belts, needle threaders, etc), normal wear and tear, negligence and misuse, as stated on the manufacturers guarantee document. The collection and return cover applies to UK mainland addresses only.
When you first encounter a problem with your machine please call our Customer Service Team on 0121 359 5335. The first thing they will ask for is your order number. They will then go through troubleshoot questions with you over the phone. If the problem still persists we will offer a collection repair and return to the customer at no cost.
Yes however, we have to arrange shipping ourselves as proof of export to customs.
Alternatively, we can refund the VAT once we have received the appropriate confirmation that the goods have been exported.
We take great pride in offering the highest level of service to our customers all over the world. If you cannot find an answer to your question, please contact our Customer Service Team on 0121 359 5335 for more information or email info@gursewingmachines.com. They will aim to respond to you within 24 hours.


