





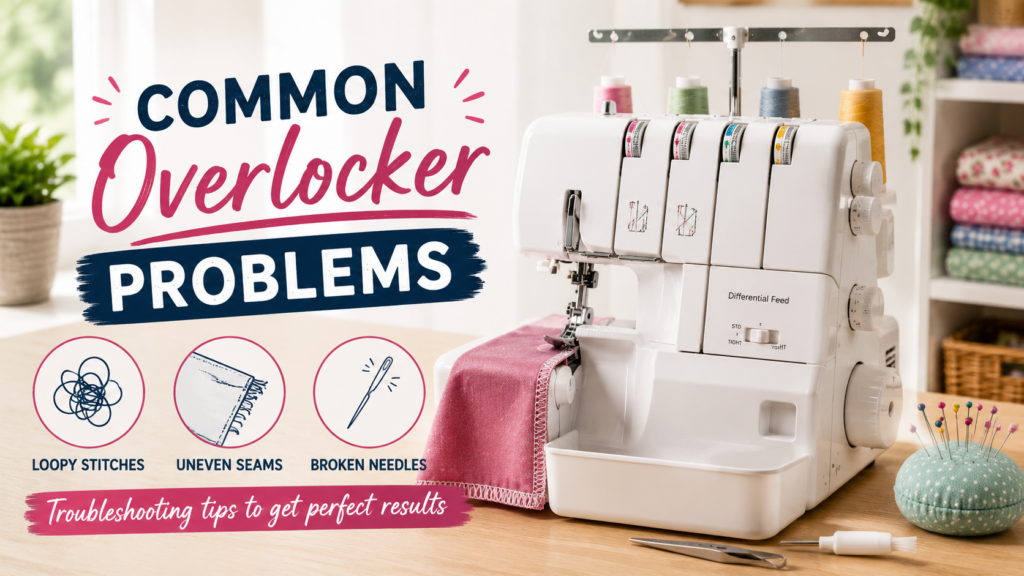
An overlocker is one of the most useful machines you can own, helping you create clean, professional-looking seams in a fraction of the time it takes with a standard sewing machine. However, like any sewing machine, overlockers can occasionally develop problems that affect stitch quality or performance.
The good news is that most issues are caused by simple setup or maintenance errors rather than serious faults. In this guide, we’ll look at the most common overlocker problems, explain what causes them, and show you how to get your machine sewing perfectly again.
Quick Reference
Not sure where to start? Match your symptom to the likely cause below, then jump to the full section for step-by-step fixes.
| Symptom | Most likely cause |
| No stitch forms at all | Incorrect threading order |
| Thread keeps snapping | Tension too tight, or worn needle/thread |
| Stitches are skipping | Blunt, bent, or wrong-size needle |
| Needle keeps breaking or missing stitches despite being new | Needle inserted incorrectly (wrong way round, or not pushed up fully) |
| Loops hang off the fabric edge | Looper tension too loose |
| Seam is puckering | Tension too tight or differential feed incorrect |
| Knit fabric waves after sewing | Differential feed too low |
| Fabric barely feeds through | Lint in the feed dogs or presser foot pressure wrong |
| Machine is unusually noisy | Lint build-up, loose screws, or needs oiling |
| Blade isn’t trimming cleanly | Blade not engaged, or blunt |
| Stitch looks uneven after changing thread count | Spare needle left in from 3/4-thread mode |
1. The Overlocker Won’t Form Stitches
One of the most frustrating problems is when the machine runs but doesn’t create a proper stitch.
Possible causes:
- Incorrect threading order
- A thread has slipped out of a guide
- The presser foot wasn’t raised during threading
- Bent or damaged needles
- Incorrect stitch settings
How to fix it:
The first thing to do is completely re-thread the machine following the manufacturer’s recommended threading order. Most overlockers should be threaded in this sequence:
- Upper looper
- Lower looper
- Right needle
- Left needle
Also check that every thread is seated correctly in the tension discs and replace the needles if they’re bent or blunt.
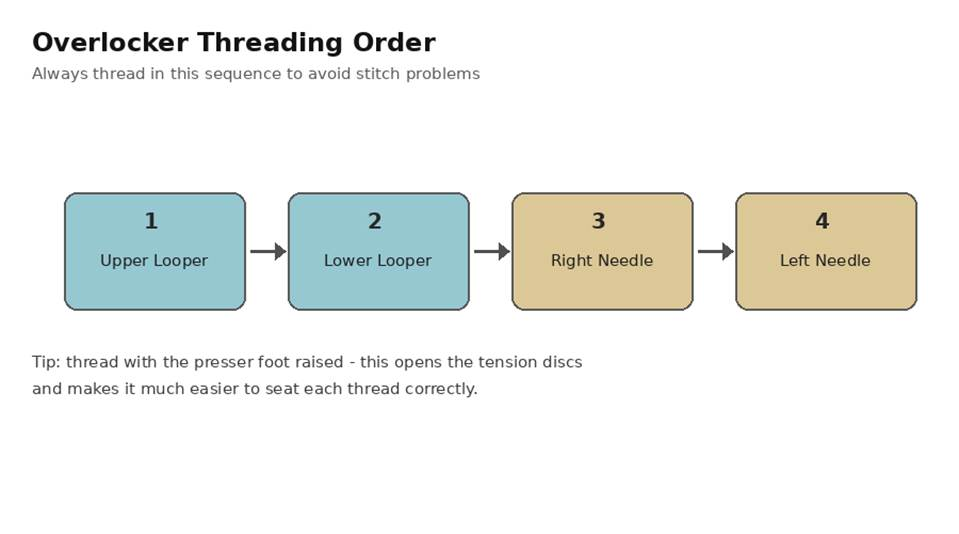
The standard overlocker threading order – always work through it in this sequence.
2. Thread Keeps Breaking
If your threads keep snapping while sewing, don’t panic – it’s one of the most common issues.
Possible causes:
- Thread tension is too tight
- Poor-quality thread
- Incorrect threading
- Burrs on the needle or looper
- Worn or damaged needles
- Thread cone seated too tightly on the spool holder
How to fix it:
- Re-thread the machine from scratch.
- Reduce the thread tension slightly.
- Replace old needles.
- Use high-quality overlocker thread.
- Check for damage around the needle plate and loopers if the problem continues.
- Make sure thread cones sit freely on their holders – too tight and they can’t unwind smoothly, too loose and they wobble.
3. Skipped Stitches
Skipped stitches can make seams weak and untidy.
Possible causes:
- Blunt or bent needles
- Incorrect needle type
- Wrong needle size for the fabric
- Incorrect threading
- Loose needle screw
How to fix it:
Always use fresh needles suitable for your fabric. Ballpoint needles are ideal for knit fabrics, while universal or sharp needles are better suited to woven materials.
- If changing the needle doesn’t solve the problem, re-thread the machine.
- Check the needle screw is fully tightened – a needle that isn’t seated firmly can miss stitches.
4. Needles Inserted Incorrectly
This is one of the most common overlocker mistakes, and it’s easy to do without realising – the needle looks “in”, but it isn’t seated correctly.
Possible causes:
- Needle inserted with the flat side facing the wrong way
- Needle not pushed all the way up into the clamp before the screw is tightened
- On twin-needle machines, needles inserted at the same height instead of offset
- A regular sewing machine needle used instead of a proper overlocker needle
How to fix it:
- Check your manual for which way the flat side of the needle should face – on most machines this is towards the back.
- Push the needle all the way up into the clamp until it stops, then tighten the screw firmly.
- On machines with two needles, remember the left needle usually sits slightly higher than the right – check your manual for the exact offset.
- Always use needles designed for your overlocker model rather than substituting a domestic sewing machine needle.
5. Loops Hanging Off the Edge
If your stitches look loose and loops are hanging over the fabric edge, your tension settings usually need adjusting.
Possible causes:
- Incorrect thread tension
- Stitch width too narrow
- Cutting width not adjusted correctly
How to fix it:
- Gradually adjust the looper tensions until the stitch wraps neatly around the fabric edge.
- Always test on a scrap piece of the same fabric before continuing with your project.
6. Fabric Is Puckering
Puckered seams can spoil an otherwise beautiful project.
Possible causes:
- Thread tension too tight
- Differential feed incorrect
- Stitch length too short
- Lightweight fabric stretching during sewing
How to fix it:
- Reduce the thread tension slightly and experiment with the differential feed.
- Most modern overlockers include differential feed specifically to eliminate stretching and puckering.
7. Stretch Fabric Waves After Sewing
This is particularly common when sewing jersey or knit fabrics.
Possible causes:
- Differential feed too low
- Pulling the fabric while sewing
- Incorrect stitch settings
- Presser foot pressure set too high
How to fix it:
- Increase the differential feed until the fabric feeds evenly.
- Let the machine move the fabric naturally – avoid pulling it through the machine.
- If the seam still looks stretched, try lowering the presser foot pressure slightly.
8. Fabric Isn’t Feeding Properly
Sometimes the fabric barely moves or feeds unevenly.
Possible causes:
- Feed dogs clogged with lint
- Presser foot pressure incorrect
- Thick seams causing resistance
How to fix it:
- Clean the feed dogs thoroughly and remove any lint build-up.
- Check your machine’s presser foot pressure settings and adjust them if necessary for thicker or thinner fabrics.
9. The Machine Is Very Noisy
A slightly louder sound than a sewing machine is normal, but excessive noise usually indicates something needs attention.
Possible causes:
- Lint build-up
- Loose screws
- Lack of lubrication
- Damaged needles
How to fix it:
- • Clean the machine thoroughly, tighten any loose screws and oil the machine if your manufacturer’s instructions recommend it.
- • Never ignore unusual knocking or grinding noises, as these may require professional servicing.
10. The Knife Won’t Cut Properly
The built-in blade should trim fabric cleanly as you sew.
Possible causes:
- Blunt cutting blade
- Blade switched off accidentally
- Sewing very thick materials beyond the machine’s capability
How to fix it:
- Check that the blade is engaged and clean away any lint or thread wrapped around it.
- If the blade has become dull after years of use, it may need replacing.
11. Thread Keeps Tangling
Thread tangles are often caused by incorrect threading rather than a machine fault.
Possible causes:
- Thread cones tangled
- Incorrect threading sequence
- Thread jumping out of guides
- No thread tail left when starting to sew
How to fix it:
- Remove all threads and begin again.
- Although it takes a few extra minutes, fully re-threading the machine usually solves the majority of stitching problems.
- Leave a few inches of thread tail behind the presser foot before you start sewing, so the threads don’t pull back and tangle under the stitch plate.
12. Stitches Look Uneven After Switching Thread Count
If you’ve switched between 3-thread and 4-thread overlocking and the stitch suddenly looks wrong, the cause is often simpler than it seems.
Possible causes:
- A spare needle left in the machine from the mode you were using before
- Converter not engaged or disengaged correctly for 2-thread models
How to fix it:
- Remove any needle that isn’t needed for your current stitch – an unused needle left in place will throw off the tension of the whole stitch.
- Double check your machine’s converter or needle plate is set correctly for the thread count you’re using.
A Simple Tension Reset
If you’ve made several tension adjustments and the stitch still isn’t right, it’s often faster to start over than to keep guessing:
- Turn all tension dials back to their default settings (usually marked on the dial, or 0 if unmarked).
- Re-thread the machine completely with the presser foot raised, so each thread seats properly in the tension discs.
- Adjust one dial at a time, testing on scrap fabric after each change.
- Keep a written note of the settings that work well for different fabrics, so you’re not starting from scratch next time.
This reset approach is one of the quickest ways to isolate whether a problem is caused by tension or by something else, like threading or a worn needle.
Preventing Overlocker Problems
Regular maintenance is the easiest way to keep your overlocker running smoothly.
Good habits include:
- Clean away lint after every project.
- Change needles regularly.
- Use high-quality thread.
- Cover the machine when not in use.
- Have it professionally serviced according to the manufacturer’s recommendations.
- Test stitches on scrap fabric before starting every project.
- Keep a simple log of tension settings for different fabric types.
These simple steps can prevent many common issues before they occur.
When Should You Seek Professional Repairs?
While many problems can be fixed at home, some require expert attention.
Consider having your machine serviced if:
- The timing appears to be out.
- The loopers strike the needles.
- The motor struggles to run.
- The machine makes grinding noises.
- Tension adjustments no longer improve stitch quality.
- Internal components appear damaged.
A qualified sewing machine technician can diagnose and repair these issues safely.
Final Thoughts
Most overlocker problems aren’t serious and can usually be resolved with careful re-threading, fresh needles, tension adjustments and regular cleaning.
Learning how your machine works – and taking a few minutes to troubleshoot methodically – will help you spend less time fixing problems and more time enjoying your sewing.
With regular maintenance and a little patience, your overlocker should provide years of reliable performance, helping you create beautifully finished garments and professional-quality sewing projects.
| Need a hand? If you’ve worked through this guide and your overlocker still isn’t stitching correctly, get in touch at info@gursewingmachines.com – we’re happy to advise, or arrange a service if your machine needs expert attention. |
Frequently Asked Questions
Why has my overlocker suddenly stopped stitching properly?
Incorrect threading is the most common cause. Completely re-thread the machine in the correct order and replace the needles if necessary.
Why does my overlocker keep breaking thread?
This is usually caused by excessive thread tension, poor-quality thread, incorrect threading or worn needles.
Why are my overlocker stitches loose?
Loose stitches are normally a sign that the looper tensions need adjusting or the stitch width needs changing.
How often should I clean my overlocker?
It’s a good idea to remove lint and fabric fibres after every sewing session. Overlockers produce more lint than standard sewing machines because they trim the fabric as they sew.
Why does my stitch look different after switching from 4-thread to 3-thread overlocking?
Check that you’ve removed any needle not required for the stitch you’re using – a spare needle left in place is a common and easily overlooked cause of uneven stitching.